Wednesday, 24 April 2013

#16 The deadly side

              It's pretty easy to get scared over something you don't understand. Most teens I know don't get a lot of exposure to harvesting the wild, so it's understandable they are uneasy to go out and scavenge. All you need is a guiding hand to direct you towards the good and the bad of nature. If you're out in the woods all alone and need some food, knowing what to pick is vital... So here's somethings you shouldn't be picking.

               Firstly, mushrooms. Like many have probably warned you, there are some extremely vicious ones that can cause severe illness and even death. Here are some warnings when consuming mushrooms.

              1. Always have and identification book! Species can easily be confused! There are very often false versions of commonly eaten mushrooms to be mistaken with. This is a must for all wild edibles.
              2. Eating a single bite of a toxic mushroom can get you sick right away. BUT it could take hours before you start seeing the effects from other species.
              3. Death is very possible when eating the wrong mushrooms. Don't go by old wives tales to find out whether or not their edible, just identify it properly.
              4. Mushrooms can affect people differently. Some reactions may be more severe.
              5. Illness could also mean getting hhhiiiiiggghhh!


Destroying Angel (Amanita virosa)
              The destroying angel mushroom is beautiful, but as inferred by it's name, it is deadly. This mushrooms has a frightening habit of not showing deadly symptoms until 5-24 hours after consumption.  It is often confused with the button mushrooms (common mushrooms purchased at the grocery store), as it's all white, and in it's youth has a button cap.

                        
              This mushroom is completely white, and has a 'veil' along it's stalk, and long gills under the cap. Despite their gorgeous appearance, these mushrooms will cause vomiting, diarrhoea, and ultimately cause your liver to bleed out. You'll die slowly in a matter of days.... ugh.


Here are some other mushrooms to steer clear from!
Deadly Galerina- Amanitin(These kill the most in North America!)

                     
Be prepared for bloody diarrhoea!
  
Shaggy Chantrelle- Gomphus floccosus
(Can be confused with the delicious chantrelle)

 Jack O'Lantern Mushrooms- Omphalotus olearius(Can be confused with chicken of the woods)
                                               These mushrooms do not taste like chicken


Thursday, 18 April 2013

#15 Trick or treat?


               Foraging is a peaceful way to harvest free and delicious food. As much as I encourage this practice, I feel it is natural and courteous to warn and guide new scavengers toward safe and healthy searches. Threats vary from plant to plant; sometimes it's neighboring plants, sometimes it's similar features. One slip up could result in severe illness or even death! So be adventurous, but stay smart.

              Okay firstly, buy a guide for wild goods. I've got, like, ten. You can buy an edition which specifies on greens, fruits, mushrooms, and some combine all three. A proper guide will include where to find your desired plants, when they're gowing, what they look like, and also include warnings as to what could possibly go wrong when scavenging. 

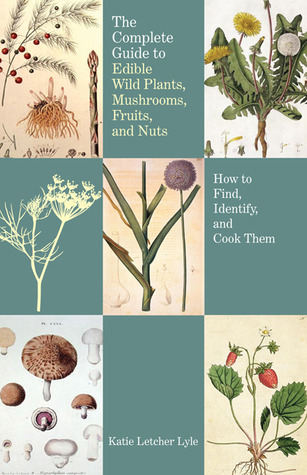
              Some titles I'd recomend is The Complete Guide to Edible Wild Plants, Mushrooms, Fruits, and Nuts by Katie Letcher Lyle. This is a great book for beginners; it's simple to follow the info! Other titles I have are usually for identifying mushrooms, but this is an absolute MUST with mushrooms. There are thousands of different mushroom species. If you find your self lost in the woods I wouldn't go looking for mushrooms as food, unless you're experienced, it's so easy to get confused.

Monday, 15 April 2013

#14 Summer and Fall Mushrooms

               Mushrooms are sprouting almost all year, here are some for summer and fall!

Summer- Oyster Mushrooms
              Oyster Mushrooms are my favorite mushrooms. You can probably pick some up in stores for a pretty penny, but you can also find these guys laying around on your next summer hike. It wasn't too long ago my family and I filled a cooler full while venturing through an old growth forest. These 'shrooms are delicious! At home we'll wash 'em, cut 'em, then fry them up with butter and cream and place 'em on top of toast! A favorite treat on mine.

What do they look like?Oyster mushrooms are a light cream to white. They have smooth caps, and long white gills lining the bottom.
Where to find them? These guys can be found on fallen trees. Preferably in old growth forest.
When? I've found some great oysters in the mid-summer! 


Fall- Puffball Mushrooms

            Next time you're going for a hike in the fall, if you see a random soccer ball resting far from the path, take a second look. The round thing you see could possibly a puff ball mushroom! These guys are edible and delicious in their earlier life. These guys are random in occurrence and prefer up lifted earth. So good luck when searching!


What do they look like?
These guys should be round and white. Smooth all the way around. Size can vary from around eggs to soccer balls. When you cut it open the gills should be the same and kinda spongy. Only eat these if the whole body is white. Be careful if there's discoloration.
Where to find them? Find them in warm fall on uplifted earth.
When? Fall
           

Wednesday, 10 April 2013

#13 'Shrooms


               Mushrooms are my past time... Not the magic kind, or the extremely deadly kind, but the delicacy kind that costs lots of money if you were to buy them. Luckily, I've been raised in a family that knows how to hunt for the most expensive and most delicious mushrooms, so I'll share SOME tips ;)

               Wait, did I just hear you say you don't like mushrooms? Well, that's because you're buying those bland old white button 'shrooms which are wrapped in blue Styrofoam and plastic. Different mushrooms have different flavors, and like most wild plants, they taste better than anything mass produced in the store. So I recommend with my whole heart that the next time you go on a hike, glance down at the forest floor for fungi.


Spring- Morels
               Early spring is the time for the most expensive mushrooms, morels. Morels can at it's most expensive price, go for around $50 a pound, but if you're lucky enough to find that many morels, you're not going to want to sell them; you're going to eat them up. Morels have a delicate flavor, and that's probably because of thier delicate growth habits. No one has ever been able to cultivate morels, and locating them can be a real challenge as they grow randomly in locations, and the weather can kill them easily. For example, last march in southern Ontario we had a bizzare week of hot summer weather, every one was in short's and tee's. The morels (and lots of other plant things) sprouted thinking it was spring. The next week the snow and typical March weather returned and killed everything. So unfortunately, we didn't get out in time to have any morels last year because of that one week. I was ticked.


What do they look like? Morels look like brains on a stick. The cap (top) of the mushroom is wrinkled into many folds which resembles the brain. They can vary from light creams to rich browns, all are delicious!
Where to find them? The forest floor, especially a few days after a rain. Look under and around leaves. A rule with mushrooms- if you don't find them, they'll find you.
When? Early spring (april - may)

Sunday, 7 April 2013

#12 More green treasure

Lamb's-Quarter
            Lamb's-quarter, goosefoot, or pigweed is a delicious discovery. Little to most people know, we can enjoy them also.
Lamb's-quarter has a very distinct look. It can be one to three feet tall, have rough, triangular shaped leaves, and has a white powder (which resembles baby powder) dusted over it.  It's grey, and sometimes streaked with red. You can find it in fields, pastures, edges of gardens backyards.


Lamb's- quarter is often compared to spinach, as it has a similar flavor, and is quenched in nutrition. Try replacing your spinach with these wild greens in your next cooked meal.


Asparagus
               Asparagus is no forgien entity to our north American plates. So how appealing is it to know you can get your dinner for free? An extra bonus, it's obviously tastier than the store bought stuff.
May is a great time to search for these guys. Look in well drained, moist, soil which are warmed by a full sun. Their location can vary, so once you find a cluster of shoots, leave a few to grow, and visit the next year. All in all, these greens like to hide.
Asparagus is good when the shoot is young and sprouting small.  When you've located it slide your fingers down the length until the shoot is bendable. This is where you should break it.


Wednesday, 3 April 2013

#11 yummy greens

                Obviously the best time for picking vegetables is usually around spring and summer, luckily, these are also the best times to adventure! Here are some recommended greens to search for!


Dandelion              Don't go eating the yellow flowers on your lawn, please. It's the dandelion leaves which are edible!
Look for these leaves in early spring before their flowers are in bloom. At this time they are crunchy and mildly bitter. After the flowers bloom (in later spring) the leaves become leathery and gross tasting.
If you're in Canada, I think you know where to find these delicious weeds!

These guys are most commonly used in salads, but they're also perfect as a green boost in a smoothie! They're also great sauteed with light butter, if you're craving savoury! Each leaf is loaded with iron, vitamins C and A, so your body will be thanking you for eating!

Fiddle heads               My family looooooves fiddle heads! We have numerous jars pickled at home to last us through the year, but in the spring we saute 'em up when their fresh. Fiddle heads are the sprout of one of the oldest plants, ostrich ferns. They have this funny name because the tips of these plants are curled like a fiddle, or the top of a violin. These delicious guys are to be found eaten in early spring (April - may), when their just a few inches of of the ground and the tender plants are curled up tightly. Look for them in wet lands like marshes, swamps or lining streams! Loaded with iron, zinc and many vitamins, these tender plants are best sauteed and sprinkled with lemon juice and pepper!


Loaded with iron, zinc and many vitamins, these tender plants are best sauteed and sprinkled with lemon juice and pepper!

Tuesday, 2 April 2013

#10 scavenger

               When I mention food in the wilderness, I don't mean hunting and trapping, I'm talking about foraging. Mother nature has a ridiculous amount of gifts to offer. If you know which ones to accept, you are in for a wonderful treat from the plant world.  But it takes experience to know how and where to hunt for your desired plant species.
               I LOVE scavenging for wild edibles! No matter the season, my family and I are hunting and harvesting some thing from the wild. Having the ability to not only explore the wild, but harness it for good, delicious use is a heart warming and soul finding activity. The plants, fruits, nuts, and
(most importantly) mushrooms are good for your soul when scavenging, but the nutritious value is good for your body. Either way it's a win/win situation, in my opinion.
               The grocery store could never supply the same adventure as foraging for wild foods. I don't understand why people even go to the grocery store in the summer! Unless you're craving tropical things, all your costs can be cut by growing or searching for what freely sprouts in the ground! It's so rewarding to find it on your own, and to know it's pesticide and hormone is an obvious bonus.
               Before you get lost in the wild, I recommend you scavenge before hand! It's always nice to have something which will fill up your belly after a long hike! Also, you always have to be careful when scavenging to prevent confusion with a species potentially poison. If you're ready to harness the natural world around you, be sure to grab some books which can help you identify your wild finds! Go and explore!

Sunday, 31 March 2013

#9 Water

               Depending on your conditions, dehydration can be the first thing to get you. Since our bodies are made up of 50-75% of it, and our brains 80%, it is essential that we keep consuming water to keep us hydrated! During the winter, hydration will be easy from eating snow. Spend your time making warm shelter and fire! Or you should consider buying a portable water filter. If you're often adventuring near trust worthy water, then definitely think of getting one of these pump filters, they're quick and easy to use!

              Rule of thumb? Always have water with you when venturing out!

 But what about when your supply runs out? This method works great in warmer months, and can also be altered to collect rain water.

Belowground Still                                                  


What you'll need
-Container
-Sheet of plastic
-Long tube
-Rock (s)
-Leaves

               1)Dig a hole in moist ground.
               1 meter across, approximately 60 centimetres deep. Moist soil is preferred.

               2)Insulate the sides of hole with leaves and other foliage
   

               3)Dig small space in centre of hole.
                This is what will hold your container, keep it snug.

               4)Put long tube into the open side of container.
                Container should be upright, other end of tube should reach out of hole. Plug the tube when    
                not in use as a straw.

               5)Place your plastic sheet on hole.
               Give plastic slack
  
               6)Anchor plastic with rocks, sail, or heavy soil.

               7)Place a rock in center of plastic sheet.
               This will cause the plastic to lean inward into the hole. Make sure it leads into the open                       
               container.  The plastic should be leaning on a deep enough angle, that water collected will fall  
               into the middle. (40 cm)

               8) Let it sit for a warm day.
               You should have half - one full litre of water.


Rain Water Still

What you'll need
-CLEAN Tarp
-Rope
-Bucket
-CLEAN Rock

               1) Tie ends of tarp to trees
               Do not tie ends tightly, keeps lots of slack.

               2)Use rock to anchor tarp
               Rock should fall to centre of tarp, this will lead the water in downward direction.

               3)Let rain water collect in centre of tarp
              
               4)Slowly release one side of tarp so water will drain into bucket.
               OR cut small hole in deepest part of tarp and place bucket below, water will drain into bucket.

               5)Filter water with fire, hand held pump, shirts, towels, ext...


Tuesday, 26 March 2013

8 fire


FIRE          
            Man's greatest discovery is something you'll have to rediscover all on your own to keep warm when you're out it the woods.
           Fire has many uses which will aid in survival.
It supplies warmth, cooks, sterilizes water, the smoke creates rescue signals, warms and dries clothes and other materials, and can overall help supply hope and comfort when you’re bare in the woods.
            If you’re without matches, it’s going to be difficult to start a fire, let alone keeping it continuous. Here are some methods to start a fire without matches.


            Maybe you've read Lord of the flies lately, and know of the Lens method. This method uses a lens to enhance and focus the sun on a specific spot. This heat on the item causes it to burn, leading to your fire

What you'll need-Lens
(Glasses, magnifying glass, binoculars, camera lens)
-Sun
(Crucial to this procedure. Don't bank of fire from this method on an overcast day)
-Kindling
(Leaves and other forest debris like bark and twigs which will catch on fire easily)
-Tinder
(Thicker sticks and think logs which take more time for the fire to chew through)
            1)Create a nest of leaves and debris.
This bundle of sticks, twigs, dry leaves, bark, and other dry forest material will be the kindling, which initial easily flammable material which your lens will be focused on to ignite. Material MUST be dry. Do not put anything damp in your nest. You do not want your spark being smothered.

2)Set up tinder

       To keep the fire burning, you’ll need tinder (thicker sticks which will take longer to burn) around the perimeter of your fire. Grab thicker sticks, and place them around your fire in a tee-pee shape. Balance them so one end of your sticks are on the ground, and the other ends are reaching upward and balancing on each other. 
***Make sure to keep space between the sticks! Oxygen needs to stay at the fire to keep it going. Have a few gaps between sticks do you can also reach at the kindling!

3)Harness your lens for fire
-Find the space where tinder is openly available from kindling
-Hold lens approximately 30 cm from tinder.
-A concentrated light will come from the lens if you angle it correctly; maneuver this spot to focus on your tinder.
-Hold till in ignites. Keep oxygen flowing through by blowing the fire regularly.

This should start a fire in no time!


If you do not have a lens, you’ll have to go basic. Rubbing sticks together, basic.

The Fire plough is a long, but useful method when all you have is wood..

What you’ll need
-Soft log, cut in half so one side is open to the inside.
-Sturdy stick
-Kindling
-Tinder

               1)      Follow steps one and two of the lens method.
               You’ll need kindling to start your fire, and tinder to keep it going for all methods


               2)  Position the soft log, rest your knees on the one end to keep a sturdy hold.

               3) Cut a small thin line in the long, inner side of the log, going with the grain.

               If you don't have a knife, try to use a sharp rock.

               4) Place a small piece of kindling at the very end of your log
              The best (most flammable piece you have)

               5)Place the end bottom end of the stick into the groove in the wood.

              6) Quickly push the end back and forth down the thin line in the wood.
              
The temperature will rise, and the heated wood particles will fall onto the kindling and ignite it


This may take a little longer. Make sure log and stick are dry!

Sources:
http://adventure.howstuffworks.com/survival/wilderness/how-to-start-a-fire2.htm
http://www.fieldandstream.com/photos/gallery/survival/fire/2006/10/seven-ways-light-fire-without-match?photo=1#node-1000014415


Friday, 8 March 2013

7 Shelter


           If you're intelligent, you would've packed a proper tent. If you're misfortunate, your proper tent is missing, mangled, or useless. No matter the reason, you don't have shelter, and you're going to need it!
            Although the summer nights are compelling, and it's always a treasure to sleep under the stars, having a shelter ready is your best bet to surviving a little more comfortably. Why? Well a shelter is your best bet to defend yourself against the elements. Anything with walls and a roof will help keep the rain, wind, and snow out.
                     
            If you’re stranded somewhere without any place to stay, begin your shelter construction immediately. When night falls, it’s going to be difficult (and somewhat terrifying) to have to scavenge for sticks and supplies for your shelter, and you don’t want to get lost.

  There are many ways to construct a shelter! But here are some methods for when you’re out in the woods.

               1) Evaluate your area and setting!
               If it is windy, find a deeper spot in the earth (like a ditch) to build your shelter. Some    
               recommend digging a small hole (just larger than your waist) in the ground to keep you warm             
               and further from the wind. But if it looks like rain, stay away from deep areas. You don’t
               want your place to flood!

               -Find a large object.
               This will be a one wall, or support for your shelter, and (if you've found something large             
               enough) it can be a solid spot to stop anything from entering. This object can differ in your             
               environment. But in my kind of camping, it’s large rocks, trees, up rooted trees, and
               boulders. Use whatever you feel is sturdy, and reliable enough to build your shelter on.
               Most shelters rely on leaning and wedging sticks through sturdy objects and building around
               them! If you haven't found a large object, find something sturdy and reasonably sized (a             
               stump is prefect, or a tree with a branch which you can wedge your stick through). Smaller
               objects will not replace walls, but they will be the balancing items for the center stick (spine of
               your shelter)

               -Next, begin collecting wood and sticks.
              These will become the other walls for your structures if you’ve found something to lean them             
               against.  Search for varying sizes.

               -Lean your sticks against your object to build the walls.
               I recommend beginning with large, thick branches or sticks. This will give your walls more 
               weight, and more reliable if the wind comes in and tries to knock 'em over. If possible, find a 
               spot to wedge your strongest stick to act as the spine of your shelter's skeleton; this will reduce 
               its chances of falling or breaking.

               -Find leaves, debris, and other clumping items.
               Leaves and cedar foliage, and twigs are the luckiest to find. Pack this debris on your walls. 
               This will insulate your shelter. The thicker your insulation, the better hidden you are from the 
               elements and animals.


               Your small shelter should be looking about ready now. This concept looks easy, but it is a balancing act between sticks, and may take practice. There are many, many different ways to build a fort. Methods differ depending on what your resources are, make the plan work for you.


               1)Change your skeleton
               Try to find two trees relatively close together. Close enough you can either tie a rope to both  
               trees, or wedge a long stick in between a limb on both of them.

               2) Make this line of connection as straight as possible.
               This will be the spine.
               
               3)Find sticks large enough to lean on the spine and insulate!


WARNINGS
-Keep your fire
at least 6 feet away from your fort! This will avoid sparks possibly igniting your new pad.
-keep close to your shelter. You don't want to get lost (especially in the dark). This will also save your energy.
-Build your shelter on the downward side of cliff or hill. This will better protect you from the elements.
-Avoid ditches if possible, if the rain (or a flash flood) comes in you don't want to get washed out.
-Watch out for splinters! Ouch. They could easily get infected in your environment.
-Be wary of bugs. If you're on the ground, odds are they're with your. Wear bug spray (if you have it) and as much clothing as possible!


6 Winter camping


            The groundhog saw its shadow just over a month ago, so it's a sign that winter is heading on its way out. But just before it's gone, maybe take a chance to go winter camping. I know what you're thinking.... But trust me, odds are you're going to stay warm, and you won't die in the ice. Please, don't let the snow scare you away from the woods. Find uses for it! Winter camping supplies the opportunity to engage in your favorite winter activities like snowshoeing, cross country or downhill skiing, snowboarding, tobogganing, and snowy hikes!
            Since winter camping isn’t as popular, it’s so peaceful in the quiet woods, and you can camp where ever you want! This kind of camping is a challenge, so it’s definitely rewarding when you’re finished!

How to do it?

Clothing
            Winter camping is similar to summer camping, but with a lot more clothes on!
 Since you’re going to be out in the snow you are going to need lots of layers to keep you warm!
Bring many pairs of socks, sweaters, long johns, warm pants (forget jeans, but remember pajamas), gloves, hats, scarves, snow pants, water proof coats, wind breakers and anything else that’s going to keep your body covered, warm, and dry!

Gear
 Tent
            Since you’re used to summer camping, odds are you have a nice tent. This tent can work in the snow, but you’re going to need to weight it down, as the pegs usually used for this are not effective in the snow. Find anything to use as the anchor!

 Sleeping Bag
            Your sleeping bag is made for summer camping. To ‘winterfy’ it, you’ll need to use the same methods as your clothing: layer!!!! Use liners and bag covers to keep yourself warm, and the elements off of it!
            In the summer you may use sleeping pads to keep you comfortable, but in the winter it’s just used to keep you warm and further away from the snow (even though the snow is more comfortable). Use at least two!

Boots and other gear!
           
Don’t bother going if you don’t have proper foot wear. You need heavy duty boots which are going to keep you dry and can snug into your snow pants.
            Snow shoes are a necessity when walking through heavy snow. If you only have boots, you’re going to be trudging, and stumbling if your foot sinks deep into the snow with every step. Snow shoes will keep you on top of everything.
            Cross country skis are the most convenient in my opinion! They’ll keep you on top of the snow, and get you where you want to go the quickest! You’ll need a lot of gear though; Ski boots, pegs, and the actual skis themselves, are required to operate them properly.
            Along with backpacks, think of using toboggans with rope to pack your stuff in. You can tie the rope around a safe part of your body and have it trail behind you. Be sure your supplies are secure!

Food and Water
            Pack warm food and liquids, this will keep you warm, and high calories will give you energy to explore! Drink a lot of liquids (warm and cold) this will keep you hydrated, but keep in mind that if you’re drinking too much, you’re going to have to ‘go’ a lot. Keep moderation in mind.

How to get there.
            Always know your area and trail! Camping close to shelters or public areas is wise if there’s an emergency. Just make sure you know how to get there from your camping spot (and vice versa). To keep warm you’ll be engaging in a lot of exploration activity, so know your trails!!!! Have maps of your area so you do not get lost!!!


Warnings!
- Know weather conditions! Always be prepared for the elements you’re going to face. Use common sense and avoid camping if storms are on the way.
 -Bring maps, and a g.p.s. The woods look different in the snow, and it’s much harder to get out if you’re lost in the snow.


Sources
http://www.clubtread.com/articledetail.aspx?id=49

Thursday, 28 February 2013


5 Into The Wild

Temagami


            In an earlier post I had mentioned Temagami, a gorgeous piece of crown land. It is not patrolled like public camping sites or provincial parks. You’re alone with whatever and whomever you take with you. Daniel Trask, a man from Waterloo, Ontario fell in love with Temagami, just as I had. In high school he was said to be an expert partier and socialist, and continued on later to bar-tending and construction work. It was against his parents’ wishes, and completely out of the blue when he left to Temagami, he had been there before, but this was the first time he’d venture alone. According to an article I’ve read from Explore Magazine all he left behind was a note saying “So I go to Temagami not knowing where I’m going”. He was gone for ten weeks before returning, and apparently he had transformed to a reserved, intense 28-year-old.He had become an expertise camper, and just before the winter came he decided to venture into the woods one last time.


            Daniel Trask was officially considered missing on November the 3rd, 2011. It was known he was in Temagami, as his car was still parked in the area. Many search parties were sent out to find him, but he was never spotted and he left no traces to be found. It wasn’t until May 18th, 2012, that pair of men’s large snow pants were found, inside out. It was confirmed they were Trask’s. It is assumed that he might have slipped into the freezing water, and to avoid hypothermia, he took off his freezing clothing as quickly as he could, leaving his soaked lime-green snow pants inside out. Since then his body has still not been found, and I assume it never will be.


Daniel Trask
1983-2011
 This story is heart breaking and frightening all at the same time. 
A great reminder of Mother Nature's power over even the greatest and most ambitious campers.